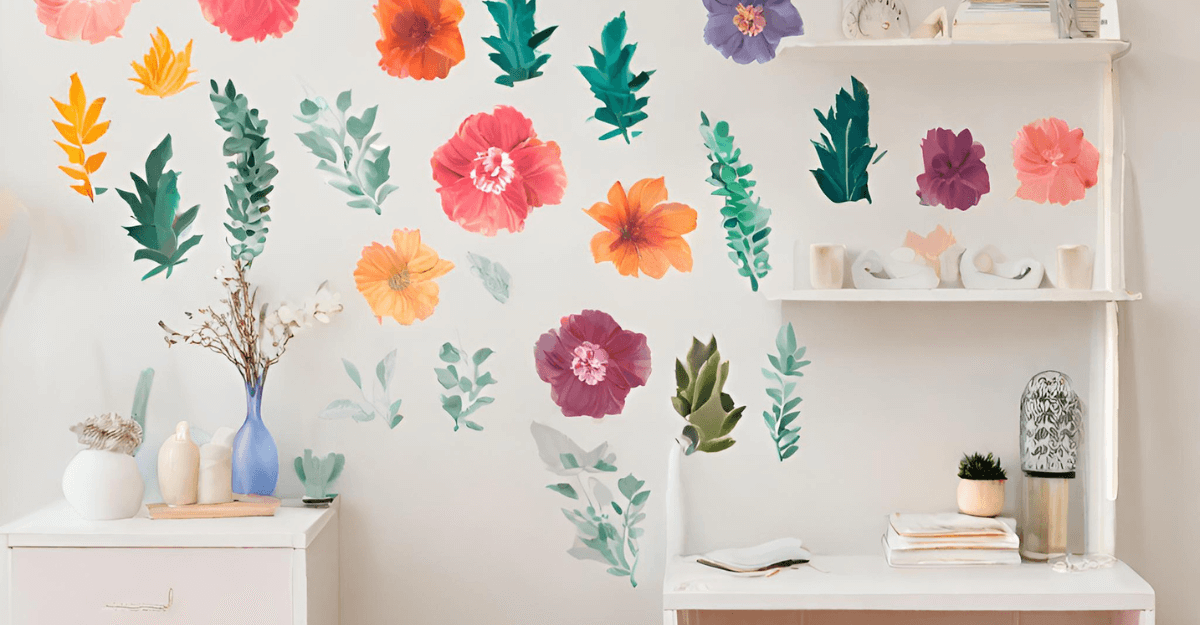
Transform your living space into a canvas of creativity without the commitment of permanent designs! Crafting your own removable wall decals is an exciting journey that allows you to personalize your environment with ease and flexibility. From selecting the perfect materials that promise durability and ease of use, to mastering the art of design with innovative tools and techniques, this guide will walk you through every step of the process. Prepare to dive into a world where your workspace becomes a laboratory for creation, and learn the secrets to applying, repositioning, and preserving your masterpieces for years to come. Whether you’re looking to refresh your home decor or create a unique ambiance, our comprehensive guide will equip you with the knowledge to bring your vision to life, ensuring your walls tell a story that’s uniquely yours.
Choosing the Right Materials for Your DIY Wall Decals
The foundation of any successful DIY project lies in selecting the appropriate materials, and creating your own wall decals is no exception. For wall decals, you’ll primarily need a high-quality vinyl. Vinyl comes in various grades and finishes, so it’s crucial to opt for one that is specifically designed for wall applications. This ensures not only the longevity of your decals but also that they can be removed without damaging the paint or leaving residue behind. Additionally, consider the finish of the vinyl; matte finishes tend to blend better with wall textures, offering a more professional appearance.
Another critical component is the adhesive backing of the vinyl. For removable wall decals, you want an adhesive that is strong enough to keep your decals in place but gentle enough to allow for easy removal. Look for adhesives labeled as removable or repositionable. The quality of the adhesive can greatly affect the overall success of your project, influencing both the application process and the ease of future removal. It’s also worth noting that the condition of the wall surface can impact adhesive performance, so ensure your walls are clean and smooth before application.
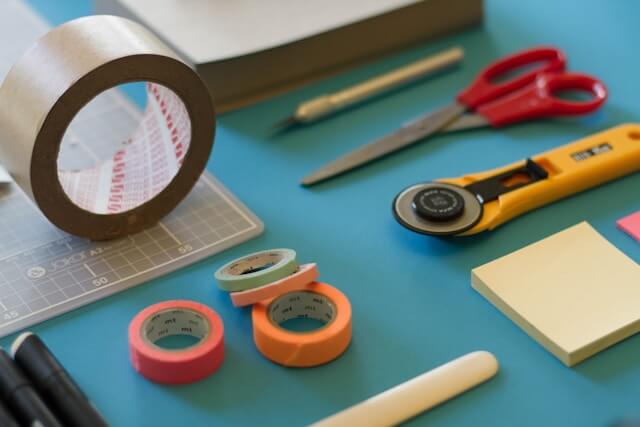
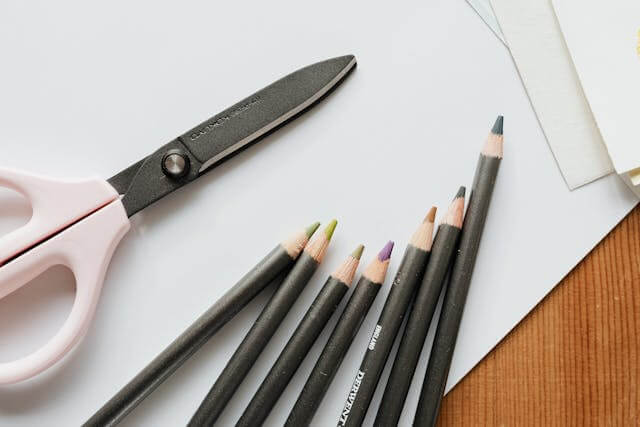
Finally, the choice of cutting tools plays a significant role in the precision and ease of creating your wall decals. A high-quality cutting machine can offer versatility and accuracy, allowing you to tackle intricate designs with confidence. For those without access to a cutting machine, a sharp craft knife and a steady hand can also achieve great results, though it may limit the complexity of the designs you can create. In conclusion, investing in the right materials from the start can significantly enhance the quality and enjoyment of your DIY wall decal project, leading to beautiful, custom decorations that can be easily updated or changed as desired.
Designing Your Custom Wall Decal: Tips and Tools
Embarking on the journey of creating your own removable wall decals requires a blend of creativity, precision, and the right tools. Choosing the perfect design for your space is paramount. It’s not just about what looks good; it’s about what feels right for the room and its inhabitants. Consider the wall size, color scheme, and room’s purpose. For instance, a calming nature scene might be perfect for a bedroom, while a motivational quote could energize a home office space.
When it comes to the technical side, vector graphics software like Adobe Illustrator or free alternatives such as Inkscape are invaluable. These tools allow you to create designs that can be scaled to any size without losing quality, which is crucial for wall decals. If you’re not familiar with these programs, plenty of tutorials are available online. Remember, the goal is to produce a design that is both aesthetically pleasing and easy to cut out, so simplicity can sometimes be your best friend.
Material selection cannot be overstated in its importance. For DIY enthusiasts, using high-quality vinyl is a must. This ensures not only the longevity of your wall decal but also that it can be removed without damaging the wall. Test the adhesiveness on a small area before full application. Additionally, consider the finish – matte or glossy – as this will affect the overall look of the decal. With these considerations in mind, you’re well on your way to adding a personal touch to your walls that can easily be changed as your style evolves.
Preparing Your Workspace and Materials for Decal Creation
Ensuring your workspace is well-organized and equipped with the right materials is crucial for creating high-quality removable wall decals. A clean, flat surface is essential for cutting and designing your decals. It’s recommended to have a dedicated table or desk where the material can lay flat and undisturbed. Lighting plays a significant role as well; ample, bright lighting will help in the precise cutting and placement of your decals. Keep your workspace free of dust and debris to avoid any imperfections on the decal’s surface. Proper organization and cleanliness are key to producing professional-grade decals.
When it comes to materials, the choice between vinyl types can greatly affect the outcome of your project. For removable wall decals, using a high-quality, matte finish vinyl is advisable as it provides an elegant look and prevents glare. The adhesive quality of the vinyl is also paramount; it should be strong enough to stick to walls without peeling off prematurely, yet not so strong that it damages the paint upon removal. Tools such as a precision cutter, cutting mat, and a squeegee are indispensable for the decal creation process. Selecting the right materials and tools is essential for achieving the desired finish and durability of your wall decals.
Below is a comparison table of commonly used vinyl types for removable wall decals, highlighting their key features to help you make an informed decision:
|
Vinyl Type
|
Finish
|
Adhesive Quality
|
Example Use
|
|---|---|---|---|
|
Matte Removable Vinyl
|
Matte
|
Medium (Easy to remove without residue)
|
Home decor, temporary signage
|
|
Glossy Removable Vinyl
|
Glossy
|
Medium-High (Stronger hold, minimal residue)
|
Decorative pieces, branding
|
|
Permanent Glossy Vinyl
|
Glossy
|
High (Not recommended for temporary applications)
|
Outdoor signage, vehicle decals
|
This table illustrates the importance of selecting the appropriate vinyl for your project. Matte Removable Vinyl is often the best choice for wall decals due to its optimal balance of elegance, adhesive quality, and ease of removal. Understanding the differences between these materials ensures a successful decal creation process.
Step-by-Step Instructions for Crafting Your Wall Decal
Crafting your own removable wall decals is a creative and cost-effective way to personalize your space. The process begins with selecting the right materials. Experts recommend using high-quality vinyl for its durability and ease of application. It’s essential to choose a vinyl that is specifically designed for wall decals, as this will ensure the best adhesion to your wall surfaces without causing damage. Additionally, investing in a good cutting machine can make the design and cutting process much smoother, allowing for more intricate designs.
Once your materials are in place, the next step is to design your decal. Utilizing software like Adobe Illustrator or free online tools tailored for decal design can greatly enhance your creative options. According to professionals in the field, it’s crucial to keep the complexity of your design in mind based on your cutting skills and the capabilities of your cutting machine. After designing, the cutting process begins. Here, patience and precision are key. Experts advise to always perform a test cut to ensure the settings are correct for the material you are using. Following the cutting, weeding away the excess vinyl then applying transfer tape will prepare your decal for its final placement on your chosen wall.
Applying Your Homemade Wall Decals: A Foolproof Method
Successfully applying homemade wall decals requires precision and patience, but with the right technique, it can be a smooth and rewarding process. The key to a flawless application lies in preparing the wall surface properly. Ensure the wall is clean, dry, and free of any dust or grease. This preparation step is crucial as it significantly affects the decal’s ability to adhere properly and its longevity. For optimal results, use a mild detergent mixed with water to clean the wall and allow it to dry completely before proceeding. This initial step cannot be overstated in its importance for achieving a professional-looking finish.
Once the surface is prepared, the next step is to position your decal correctly. A common method involves using painter’s tape to temporarily hold the decal in place, allowing you to step back and ensure it’s perfectly aligned and positioned exactly where you want it. This method offers the flexibility to adjust the placement without committing immediately. Measure twice, stick once should be your mantra here, as repositioning after the decal has adhered can damage both the decal and the wall surface. Precision in this step ensures a visually appealing result that appears as if done by a professional.
Below is a comparison table of different methods for applying wall decals, highlighting the effectiveness and ease of use for each technique. This table serves as a guide to choosing the best application method for your DIY project, ensuring a smooth and successful application.
|
Method
|
Effectiveness
|
Ease of Use
|
Recommended for
|
|---|---|---|---|
|
Direct Hand Application
|
High
|
Medium
|
Small Decals
|
|
Painter’s Tape for Positioning
|
Very High
|
High
|
Large Decals and Murals
|
|
Transfer Paper Method
|
Medium
|
Low
|
Complex or Delicate Designs
|
Choosing the right application method based on the size and complexity of your decal is essential for a smooth process and an outcome that meets or exceeds expectations. Whether you’re applying a small decal or a large wall mural, understanding the nuances of each method can make a significant difference in the final appearance and durability of your homemade wall decal.
Tips for Easily Removing and Reapplying Wall Decals
When it comes to refreshing your space with removable wall decals, the ability to remove and reapply them with ease is paramount. To ensure a smooth process, always start by cleaning the wall surface thoroughly to remove any dust or grease, as this can affect adhesion. Utilizing a hairdryer to gently heat the decal can loosen the adhesive, making it easier to peel off without damaging your walls or the decal itself. For reapplication, consider using a light adhesive spray to rejuvenate the decal’s stickiness. Remember, patience is key; rushing can lead to stretching or tearing. By following these steps, you can keep your walls vibrant and dynamic, changing up your decor as often as you like without hassle.
Maintaining and Storing Your Removable Wall Decals for Longevity
Proper care and storage of your removable wall decals are crucial for preserving their quality and extending their lifespan. Here are some essential steps to follow:
- Clean the surface before application to ensure it is free of dust and oils, which can affect adhesion.
- After removal, gently clean the decal with a soft, damp cloth to remove any residue or dust. Avoid using harsh chemicals that might damage the material.
- For storing, lay the decals flat on a clean, dry surface. If original backing paper is not available, parchment paper can be a good alternative to protect the adhesive side. Ensure they are stored in a cool, dry place away from direct sunlight to prevent colors from fading and the adhesive from deteriorating.
- When reapplying, ensure the wall or surface is in the same condition as the initial application for optimal adherence.
Following these steps will help maintain the visual appeal and adhesive quality of your decals, allowing you to enjoy them for years to come.
Creating your own removable wall decal is a rewarding and cost effective way to personalize your living space walls and unleash your creativity. By following the step-by-step guide outlined in this post, you can easily craft custom designed wall decals that reflect your style and personality. Remember to choose high quality materials, take your time during the design process, and apply the decals carefully for the best results.